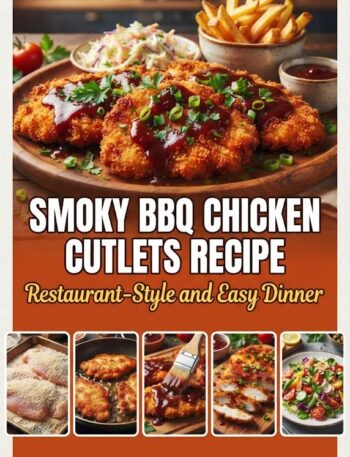

There is something primal and deeply satisfying about the aroma of wood smoke mingling with the savory scent of roasting poultry. In the pantheon of backyard culinary achievements, the smoky BBQ whole chicken stands as a titan. It is the centerpiece of the perfect Sunday dinner, the star of the summer cookout, and the ultimate test of a pitmaster’s patience and precision.
But here is a secret that many professionals won’t tell you: achieving competition-level results at home is surprisingly easy if you understand the fundamentals of heat, flavor, and timing. This guide is not just a recipe; it is a comprehensive masterclass designed to take you from a backyard novice to a BBQ hero. We will explore every facet of the process, from selecting the right bird to mastering the “Low and Slow” philosophy, ensuring that every bite you serve is succulent, smoky, and unforgettable.
Why Cook the Whole Chicken?
In an era of pre-packaged breasts and wings, the art of cooking a whole chicken is sometimes overlooked. However, roasting the bird whole offers several distinct advantages:
- Flavor Retention: Cooking the chicken on the bone preserves the natural juices and fats, leading to a much richer flavor profile than isolated cuts.
- Texture Variety: A whole chicken provides a mix of white and dark meat, catering to everyone’s preference at the table.
- Economic Value: Purchasing a whole bird is significantly more cost-effective than buying individual parts.
- The “Wow” Factor: There is no substitute for the visual impact of a golden-brown, smoke-kissed whole chicken being brought to the table.
The Foundation: Selecting Your Bird
The quality of your BBQ chicken begins at the butcher counter. When shopping for the perfect bird, keep the following criteria in mind:
- Size Matters: For the best results on a smoker or grill, aim for a “fryer” or “roaster” weighing between 3.5 and 5 pounds. Larger birds take significantly longer to cook, which can lead to the outer meat drying out before the interior reaches a safe temperature.
- Air-Chilled vs. Water-Chilled: If your budget allows, choose air-chilled chicken. Water-chilled poultry absorbs excess moisture during processing, which can lead to diluted flavor and rubbery skin. Air-chilled birds yield crispier skin and a more concentrated “chicken” taste.
- Freshness: Always check the “sell-by” date. A fresh chicken should have a pinkish hue and no off-putting odor. Avoid birds with excessive liquid in the packaging.
Preparation: To Spatchcock or Not?
Before we touch the seasoning, we must decide on the architecture of our chicken. You have two main options:
1. The Traditional Roast
This involves keeping the chicken whole, perhaps stuffing the cavity with aromatics like lemon, onion, and garlic. While classic, it can lead to uneven cooking, as the breast meat often finishes long before the thighs.
2. The Spatchcock Method (Recommended)
Also known as “butterflying,” this involves removing the backbone and flattening the bird.
- Why it works: Spatchcocking exposes more surface area to the heat and smoke. It ensures the dark meat and white meat cook at a more synchronized pace and results in exceptionally crispy skin.
- How to do it: Use heavy-duty kitchen shears to cut along both sides of the backbone. Remove the bone, flip the bird over, and press down firmly on the breastbone until you hear a crack. The chicken should now lie flat.
The Secret to Juiciness: The Brining Debate
Dry meat is the enemy of great BBQ. To combat this, we use the power of science through brining.
The Wet Brine
A mixture of water, salt, sugar, and aromatics. Submerging the chicken for 4–12 hours allows the salt to break down muscle fibers, allowing the cells to retain more moisture during the cook.
- Pros: Guaranteed juiciness.
- Cons: Can result in slightly less crispy skin due to the high moisture content.
The Dry Brine (Our Preferred Method)
This involves coating the chicken liberally with salt (and sometimes baking powder) and letting it sit uncovered in the refrigerator for 24 hours.
- Pros: The salt draws moisture out, creates a concentrated brine, and then is reabsorbed into the meat. The refrigerator air dries the skin, leading to maximum crunch.
- Cons: Requires advance planning.
Crafting the Signature BBQ Rub
The rub is where you define the personality of your BBQ. A great rub balances four key elements: Salt, Sweet, Heat, and Aromatics.
The “All-Star” BBQ Rub Recipe:
- 1/4 cup Brown Sugar: For caramelization and that classic BBQ sweetness.
- 2 tbsp Kosher Salt: To enhance all other flavors.
- 2 tbsp Smoked Paprika: For deep color and a baseline smokiness.
- 1 tbsp Black Pepper: For a subtle back-end bite.
- 1 tbsp Garlic Powder & 1 tbsp Onion Powder: For savory depth.
- 1 tsp Cayenne Pepper: Optional, for those who like a little kick.
- 1 tsp Dry Mustard: Helps the flavors bind to the meat.
Pro Tip: Always pat your chicken bone-dry with paper towels before applying the rub. If using a dry brine, go easy on the additional salt in your rub.
Choosing Your Wood: The Smoke Profile
Smoke is an ingredient, just like salt or pepper. Different woods impart different flavors:
- Apple & Cherry: These fruitwoods provide a mild, sweet smoke that turns the chicken a beautiful mahogany color. This is the gold standard for poultry.
- Hickory: A punchy, “bacon-like” flavor. Use sparingly, as it can overwhelm the delicate taste of chicken.
- Oak: The versatile middle ground. It provides a clean, classic smoke flavor.
- Mesquite: Very strong and earthy. Generally too intense for a whole chicken unless blended with a lighter wood.
The Cooking Process: Step-by-Step
Now, let’s bring it all together. This method assumes you are using a smoker (pellet, offset, or charcoal) or a kettle grill set up for indirect cooking.
Step 1: Fire Up the Rig
Preheat your smoker to 275°F (135°C). While many people cook chicken at 225°F, poultry benefits from a slightly higher temperature to help render the fat under the skin, preventing that dreaded “rubbery” texture.
Step 2: Season the Bird
Apply a light coating of olive oil or mustard (the binder) to the chicken. Liberally coat the entire bird with your BBQ rub. Don’t forget to get under the skin of the breast and into every nook and cranny.
Step 3: The Smoke Phase
Place the chicken on the grill grates, skin side up. If using a thermometer probe (which you should!), insert it into the thickest part of the breast, making sure not to hit the bone.
Close the lid and resist the urge to peek. As the saying goes, “If you’re lookin’, you ain’t cookin’.”
Step 4: The Spritz (Optional)
After about 90 minutes, check the color. If the wings or edges look like they are getting too dark, you can spritz the bird with a 50/50 mix of apple juice and apple cider vinegar. This adds moisture and helps build layers of flavor.
Step 5: The Glaze (The Finish)
When the internal temperature of the breast reaches 155°F (68°C), it’s time for the sauce. Using a silicone brush, paint a thin layer of your favorite BBQ sauce over the entire chicken.
Increase your grill temperature to 325°F (163°C) if possible. This “flash heat” sets the sauce into a tacky, delicious lacquer and crisps the skin for the final stretch.
Step 6: The Pull
Remove the chicken from the heat when the internal temperature of the breast hits 162°F (72°C).
Wait, why not 165°F? Because of “carry-over cooking.” The internal temperature will continue to rise about 3–5 degrees while the bird rests. Pulling at 162°F ensures you don’t overshoot the mark and end up with dry meat. The thighs should be around 175°F–185°F, which is perfect for breaking down their tougher connective tissue.
The Most Important Step: The Rest
Do not cut into that chicken immediately! If you do, all those hard-earned juices will run out onto the cutting board, leaving the meat parched.
Transfer the chicken to a carving board and tent it loosely with aluminum foil. Let it rest for at least 15 to 20 minutes. This allows the muscle fibers to relax and reabsorb the juices.
Troubleshooting Common BBQ Chicken Pitfalls
Even seasoned pitmasters encounter hurdles. Here is how to solve the most common issues:
- Problem: Rubbery Skin.
- Solution: This usually happens because the temperature was too low or the skin was too wet. Ensure you pat the bird dry and try finishing the cook at a higher temperature (325°F+).
- Problem: Too Much Smoke Flavor.
- Solution: Poultry is like a sponge for smoke. If the flavor is bitter or overpowering, use fewer wood chunks next time or switch to a lighter wood like Apple.
- Problem: Uneven Cooking.
- Solution: This is where spatchcocking shines. If you aren’t spatchcocking, make sure the legs are facing the hotter part of your grill, as they can handle more heat than the breasts.
Side Dishes: Completing the BBQ Experience
A smoky BBQ chicken deserves companions that can stand up to its bold flavors. Here are some classic pairings:
- Honey Butter Cornbread: The sweetness complements the smoky rub perfectly.
- Vinegar-Based Coleslaw: The acidity cuts through the richness of the chicken fat and BBQ sauce.
- Smoked Mac and Cheese: Since the smoker is already on, why not throw a tray of cheesy pasta in there?
- Grilled Asparagus: A touch of green with a charred edge balances the meal.
- Potato Salad: A creamy, mustard-heavy potato salad is the traditional partner for any Southern-style BBQ.
Beyond the Meal: Creative Leftover Ideas
If you have leftovers (a rare occurrence!), BBQ chicken is incredibly versatile:
- BBQ Chicken Tacos: Shred the meat and serve in corn tortillas with pickled red onions and cilantro.
- Smoky Chicken Salad: Mix chopped leftovers with mayo, celery, and a dash of lime juice for the best sandwich filler ever.
- BBQ Pizza: Use the chicken as a topping along with red onions, cilantro, and extra BBQ sauce.
- The Best Chicken Stock: Don’t throw away the carcass! The smoked bones make a phenomenal, deep-flavored stock for ramen or hearty stews.
The Science of Smoke: A Deeper Dive
To truly master this recipe, it helps to understand what is happening inside the grill.
The Maillard Reaction
This is the chemical reaction between amino acids and reducing sugars that gives browned food its distinctive flavor. By using a rub with sugar and cooking at temperatures above 250°F, you are triggering the Maillard reaction, which creates hundreds of different flavor compounds.
The Smoke Ring
You may notice a pinkish ring just beneath the surface of the meat. This is the “smoke ring.” Contrary to popular belief, it doesn’t add flavor; it’s a visual byproduct of nitrogen dioxide from the wood smoke reacting with the myoglobin in the meat. It’s a badge of honor among BBQ enthusiasts.
The Stall
While usually associated with larger cuts like brisket, chicken can sometimes hit a “stall” where the temperature stops rising as moisture evaporates from the surface. In chicken, this is brief, but increasing the heat slightly helps push through it to ensure the skin doesn’t get soggy.
Variations on the Theme
Once you’ve mastered the basic smoky BBQ chicken, try these variations:
- Alabama White Sauce Chicken: Instead of red BBQ sauce, dunk the finished bird in a tangy, mayo-and-vinegar-based Alabama white sauce.
- Nashville Hot BBQ: Add extra cayenne and a dash of hot oil to your rub for a fiery Tennessee twist.
- Bourbon Glazed: Incorporate a splash of high-quality bourbon into your BBQ sauce for a sophisticated, woody sweetness.
Essential Gear for the Perfect Chicken
While you can cook a great chicken on basic equipment, these tools make the process foolproof:
- Instant-Read Thermometer: Brands like Thermapen are the industry standard. Precision is the difference between juicy and dry.
- Poultry Shears: For easy spatchcocking without struggling with standard scissors.
- Heat-Resistant Gloves: Allows you to handle the bird directly for flipping or moving.
- Chimney Starter: If using charcoal, this is the only way to get your coals hot without the chemical taste of lighter fluid.
Final Thoughts: The Joy of Backyard BBQ
The “Easy Smoky BBQ Whole Chicken” is more than just a meal; it is an experience. It requires you to slow down, fire up the coals, and pay attention to the nuances of scent and temperature. It’s a process that rewards patience with a level of flavor that no fast-food outlet or high-end restaurant can truly replicate.
Whether you are cooking for a quiet family dinner or a large gathering of friends, the sight of a perfectly smoked chicken—glistening with sauce and smelling of hardwood—is a universal signal of hospitality and craft.
So, head to your local butcher, grab a high-quality bird, and light the fire. You are now equipped with all the knowledge you need to create the best BBQ chicken your neighborhood has ever tasted. Happy smoking!
Quick Reference Summary Table
| Step | Action | Target Temp / Detail |
|---|---|---|
| Prep | Spatchcock & Dry Brine | 24 hours in fridge (optional but recommended) |
| Season | Apply BBQ Rub | Use a binder like olive oil or mustard |
| Smoker Temp | Pre-heat Smoker | 275°F (135°C) |
| Wood | Choose Wood Chunks | Apple, Cherry, or Oak |
| Cooking Time | Smoke the Bird | Approx. 45-60 mins per pound |
| Glaze | Apply BBQ Sauce | When internal temp hits 155°F |
| Finish | Crank the Heat | Increase to 325°F for the last 10 mins |
| Pull Temp | Remove from Heat | 162°F internal (breast) |
| Rest | Tent with Foil | 15–20 minutes (MANDATORY) |
Frequently Asked Questions
Q: Can I do this on a gas grill? A: Yes! Simply turn off one side of the burners and place the chicken on the unlit side (indirect heat). Use a smoker box filled with wood chips over the active burner to generate smoke.
Q: Should I leave the skin on? A: Absolutely. The skin acts as a protective barrier that keeps the meat moist. Even if you don’t plan on eating the skin, cooking with it on is essential for texture and flavor.
Q: How do I know if the chicken is done without a thermometer? A: While a thermometer is highly recommended, you can check by piercing the thigh; the juices should run clear, not pink. Also, the drumstick should move easily in its socket.
Q: Can I use frozen chicken? A: You can, but it must be completely thawed in the refrigerator before you begin the brining or seasoning process. Never cook a whole chicken from frozen on a smoker, as it will spend too much time in the “danger zone” (40°F-140°F) where bacteria thrive.
Q: My rub is burning. What happened? A: This usually happens if your rub has a very high sugar content and the grill temperature exceeds 300°F for too long. If you like a sweet rub, keep your temps closer to 275°F until the very end.