
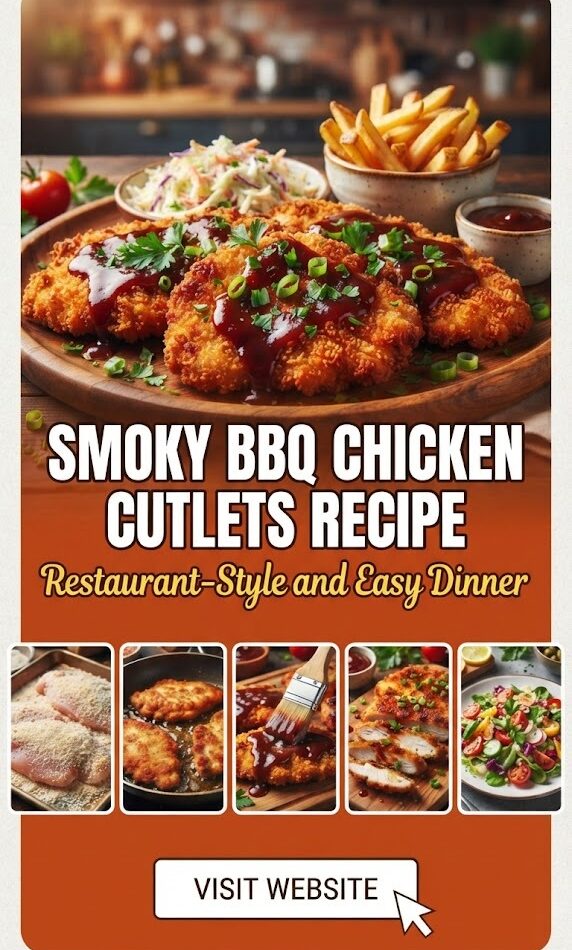
There is something universally comforting about the combination of a perfectly seared chicken breast and the deep, complex tang of barbecue sauce. However, achieving that “restaurant-style” finish at home—where the chicken remains incredibly juicy while the exterior boasts a charred, caramelized, and smoky crust—can often feel elusive. Many home cooks struggle with dry meat or sauce that burns before the chicken is cooked through.
This guide is designed to transform your kitchen into a high-end smokehouse. We aren’t just making “chicken with sauce”; we are crafting Smoky BBQ Chicken Cutlets that rival any five-star bistro. Whether you are looking for a quick weeknight dinner that will impress the kids or a sophisticated meal for a weekend dinner party, this recipe is your new gold standard.
Why the “Cutlet” Method is Superior
In the world of poultry, the cutlet is king. A chicken cutlet is simply a chicken breast that has been sliced thin and, ideally, pounded to a uniform thickness. This method offers several distinct advantages for the BBQ lover:
- Fast Cooking Time: Because they are thin, cutlets cook in a fraction of the time it takes to roast a whole breast. This means less time in the kitchen and more time enjoying your meal.
- Even Doneness: By pounding the meat, you eliminate the “thick end/thin end” problem. You won’t have to worry about a dry tip and a raw center.
- Maximum Flavor Surface Area: A thinner piece of meat means a higher ratio of seasoned, saucy exterior to juicy interior. Every bite is packed with smoky BBQ goodness.
The Foundation: Choosing Your Ingredients
To achieve restaurant-quality results, the quality of your ingredients is paramount.
The Chicken
Look for organic, air-chilled chicken breasts if possible. Air-chilled chicken hasn’t been soaked in water during processing, which means it will sear better and won’t release excess moisture into your pan.
The Smoky Rub
Before the sauce even touches the meat, we need a dry rub. This creates a layer of flavor that penetrates the fibers of the chicken. A classic smoky rub includes:
- Smoked Paprika: This is the “secret” to that outdoor grill flavor without turning on the charcoal.
- Brown Sugar: Helps with caramelization and balances the heat.
- Garlic and Onion Powder: Provides a savory base.
- Mustard Powder: Adds a subtle tang that cuts through the sweetness.
- Cayenne Pepper: For a gentle “back-of-the-throat” heat.
The BBQ Sauce
You can use your favorite store-bought brand, but for a truly “restaurant-style” experience, look for a sauce that is thick and rich. If you want to elevate the dish, look for “Kansas City Style” for sweetness or “Texas Style” for a more savory, peppery profile.
Mastering the “Smoky” Profile Without a Grill
Not everyone has access to an outdoor smoker or a charcoal grill, especially during the colder months. However, you can replicate that deep, woody aroma using three specific techniques:
1. Liquid Smoke
Used sparingly (just a few drops), liquid smoke can transform a dish. It is made by condensing the smoke from burning wood chips and is a staple in professional kitchens for adding that authentic campfire flavor to indoor-cooked meats.
2. The Cast Iron Skillet
A heavy cast iron skillet is the best tool for this recipe. It retains heat exceptionally well, allowing you to get a “hard sear” that mimics the char of a grill grate. The high heat caramelizes the natural sugars in the chicken and the added sugars in the rub.
3. Smoked Salt
Replacing standard table salt with hickory or mesquite-smoked salt adds an extra dimension of flavor that feels sophisticated and intentional.
Step-by-Step: The Recipe for Smoky BBQ Chicken Cutlets
Ingredients List
For the Chicken:
- 2 lbs Boneless, skinless chicken breasts (approx. 3-4 large breasts)
- 2 tbsp Avocado oil or Grapeseed oil (high smoke point oils are essential)
- 2 tbsp Unsalted butter (for the final basting)
For the Smoky Dry Rub:
- 1 tbsp Smoked paprika
- 1 tbsp Light brown sugar
- 1 tsp Garlic powder
- 1 tsp Onion powder
- 1/2 tsp Ground mustard
- 1/2 tsp Black pepper
- 1 tsp Kosher salt (or smoked salt)
- 1/4 tsp Cayenne pepper (optional)
For the BBQ Glaze:
- 1 cup of your favorite BBQ sauce
- 1 tsp Apple cider vinegar (to brighten the flavors)
- 1/2 tsp Liquid smoke (optional)
- 1 tbsp Honey (for extra shine)
Instructions
Step 1: Preparing the Cutlets
Start by trimming any excess fat from the chicken breasts. Place your hand flat on top of the breast and, using a sharp chef’s knife, slice the breast in half horizontally to create two thin pieces.
Place the slices between two sheets of plastic wrap or in a large Ziploc bag. Use a meat mallet or the bottom of a heavy skillet to gently pound the chicken until it is a uniform 1/4-inch thickness. This ensures the chicken cooks in about 3-4 minutes per side.
Step 2: Applying the Rub
In a small bowl, whisk together all the dry rub ingredients. Pat the chicken cutlets completely dry with paper towels—this is the most important step for getting a good sear. Rub the spice mixture generously over both sides of the cutlets, pressing it into the meat so it sticks. Let the chicken sit for 10-15 minutes; this allows the salt to penetrate and the spices to hydrate.
Step 3: The Searing Process
Heat your cast iron skillet over medium-high heat. Add the oil. You’ll know the pan is ready when the oil shimmers and just begins to wisps of smoke appear.
Work in batches to avoid crowding the pan. Place the cutlets in the skillet. You should hear a loud sizzle immediately. Cook for 3 minutes without moving them. This develops the “crust.” Flip the cutlets over.
Step 4: The Glazing Technique
Once you flip the chicken, cook for another 2 minutes. Now, reduce the heat to medium. Brush a generous amount of the BBQ glaze onto the cooked side of the chicken.
Add the butter to the pan. As it melts, it will mix with the juices and the dripping BBQ sauce. Use a spoon to baste the chicken with the melted butter and sauce. Flip one last time for just 30 seconds to “set” the sauce on the first side, then flip back and glaze the other side.
Step 5: The Rest
Remove the chicken from the pan and place it on a warm plate. Tent loosely with foil and let it rest for 5 minutes. This allows the juices to redistribute, ensuring the meat is tender and moist.
The Science of the Sear: Why This Works
To understand why this recipe tastes better than standard baked BBQ chicken, we have to look at the Maillard Reaction. This is a chemical reaction between amino acids and reducing sugars that gives browned food its distinctive flavor.
In a traditional oven-baked recipe, the chicken is surrounded by moist heat. While this cooks the meat, it rarely reaches the temperatures (above 285°F) required for the Maillard reaction to occur significantly. By using a cast iron skillet and a dry rub with brown sugar, we are forcing that reaction to happen quickly. The result is a complex, savory flavor profile that you simply cannot get from a slow cooker or a standard baking dish.
Elevating the Dish: Chef’s Pro Tips
If you want to take these cutlets to the “Black Tie” level, consider these professional adjustments:
The “Double Glaze”
In restaurant kitchens, chefs often glaze the meat twice. Once in the pan to create a sticky base, and once more right before the plate leaves the kitchen. This creates a beautiful, glossy sheen that looks incredible in photos and tastes even richer.
Infused Butter Basting
When you add the butter to the pan in Step 4, throw in a sprig of fresh rosemary or a smashed clove of garlic. The fat will pick up these aromatics and deposit them onto the chicken, adding a layer of herbal complexity that balances the sweetness of the BBQ sauce.
Temperature is Everything
Invest in a digital meat thermometer. While we provide timing guidelines, every stove is different. Chicken is perfectly cooked and safe to eat at 165°F (74°C). However, for cutlets, you can pull them off the heat at 160°F, as the “carryover cooking” during the resting phase will bring them up to the safe 165°F mark without drying them out.
Perfect Side Dish Pairings
A great main course deserves equally impressive side dishes. To complement the smoky, sweet, and tangy profile of the BBQ chicken, you want sides that offer contrast in texture and flavor.
1. Creamy Jalapeño Coleslaw
The crunch of fresh cabbage and the creaminess of the dressing provide a cooling contrast to the warm, smoky chicken. Adding sliced jalapeños gives a fresh, “green” heat that cuts through the sugar of the BBQ sauce.
2. Smoked Gouda Macaroni and Cheese
Double down on the smoky theme. Using a smoked cheese in your mac and cheese ties the whole plate together. The richness of the pasta is the ultimate comfort food companion to the lean protein of the chicken cutlets.
3. Charred Corn with Lime and Cilantro
Grilled or pan-charred corn kernels tossed with a squeeze of lime juice and fresh cilantro add a bright, acidic pop to the meal. This prevents the palate from becoming “fatigued” by the heavy BBQ flavors.
4. Garlic Herb Roasted Potatoes
For a sturdier side, small red potatoes roasted with plenty of garlic and rosemary offer a crispy texture that stands up well to the saucy chicken.
Dietary Variations and Substitutions
This recipe is incredibly versatile and can be adapted for various dietary needs without sacrificing flavor.
Keto and Low-Carb BBQ Chicken
To make this Keto-friendly:
- Replace the brown sugar in the rub with a monk fruit or erythritol-based brown sugar substitute.
- Use a sugar-free BBQ sauce (there are many high-quality options available now that use stevia or monk fruit).
- Skip the honey in the glaze.
Gluten-Free Options
Most BBQ sauces contain vinegar derived from grain or thickening agents that may contain gluten. Always check the label for a “Gluten-Free” certification. The rub itself is naturally gluten-free as long as your spices are pure and haven’t been processed with wheat-based anti-caking agents.
The Air Fryer Version
If you prefer to use an air fryer:
- Prepare the chicken with the dry rub as instructed.
- Preheat the air fryer to 400°F.
- Lightly spray the basket with oil.
- Cook the cutlets for 4 minutes, then flip.
- Brush with BBQ sauce and cook for another 3-4 minutes until the internal temperature hits 165°F. Note: You won’t get the same “butter-basted” richness, but it is a much leaner way to enjoy the dish.
Troubleshooting Common Issues
Why is my chicken rubbery?
Rubbery chicken is usually a result of overcooking or using chicken that has been “plumped” with a high percentage of saline solution. To avoid this, look for “air-chilled” chicken and use a thermometer to ensure you aren’t cooking it past 165°F.
Why did my BBQ sauce burn?
Most BBQ sauces have a high sugar content. Sugar burns at approximately 350°F. If you put the sauce on too early while the pan is at high heat, it will turn black and bitter. Always add your sauce toward the end of the cooking process and lower the heat slightly before glazing.
The rub is falling off!
This happens if the chicken is too wet. The “Pat Dry” step is not optional! Moisture creates steam, and steam pushes the seasoning off the meat. Use a paper towel and press firmly until the surface of the meat is matte, not shiny.
Regional BBQ Profiles: Which One Should You Choose?
The beauty of this recipe is that by simply changing your sauce, you change the entire cultural vibe of the meal.
- Kansas City: Thick, sweet, and tomato-based. Great for kids and those who love a classic “candy-coated” rib flavor.
- Memphis: Thinner than KC style, with a heavy emphasis on celery salt and paprika. It’s a bit more savory and “tangy.”
- South Carolina Gold: A mustard-based sauce. This is incredible on chicken because the acidity of the mustard cuts through the fat of the butter basting perfectly.
- Alabama White Sauce: A mayonnaise-based BBQ sauce with lots of black pepper and vinegar. It sounds unusual but is a legendary pairing for smoked poultry.
Storing and Reheating for Meal Prep
These Smoky BBQ Chicken Cutlets are a dream for meal preppers. They hold their flavor well and stay juicy even when reheated.
Storage
Store cooked cutlets in an airtight container in the refrigerator for up to 4 days. If you are prepping for the week, keep the extra BBQ sauce in a separate small container to add after reheating.
Reheating
To keep the chicken from drying out:
- Microwave: Cover with a damp paper towel and heat in 30-second intervals at 70% power.
- Oven: Place in a baking dish with a splash of water or chicken broth, cover with foil, and heat at 325°F for 10 minutes.
- Skillet: The best way to revive the texture. Heat a teaspoon of oil in a pan over medium heat and sear the cutlets for 1-2 minutes per side.
The Ultimate BBQ Chicken Experience
Food is more than just fuel; it’s an experience. When you serve these Smoky BBQ Chicken Cutlets, you aren’t just serving a meal—you are providing a sensory experience. The deep mahogany color of the glaze, the aromatic scent of smoked paprika and caramelized sugar, and the sound of the sizzle as the plate hits the table all contribute to a “restaurant-style” atmosphere.
By mastering the cutlet technique, understanding the importance of the dry rub, and utilizing the heat of a cast iron skillet, you have unlocked a recipe that is as reliable as it is delicious. This is a dish that proves you don’t need a backyard full of expensive equipment to produce world-class BBQ.
Frequently Asked Questions (FAQ)
Can I use chicken thighs instead of breasts?
Absolutely. Chicken thighs are naturally juicier and more forgiving if overcooked. However, they take slightly longer to cook. If using boneless, skinless thighs, you may need to cook them for 5-6 minutes per side.
Is liquid smoke safe to use?
Yes. Liquid smoke is a natural product made from actual wood smoke. It is highly concentrated, so a little goes a long way. It is a fantastic tool for adding depth to indoor cooking.
Can I make the dry rub in bulk?
Yes! The smoky dry rub used in this recipe is great on pork chops, salmon, and even roasted chickpeas. Scale the recipe up and store it in a cool, dry place for up to 6 months.
How do I get those perfect grill marks indoors?
If you want the visual of grill marks, use a cast iron grill pan (the ones with the ridges). The cooking instructions remain exactly the same.
What if I don’t have a meat mallet?
A heavy rolling pin, a wine bottle (be careful!), or even a heavy canned good can work to pound the chicken. Just make sure the meat is covered in plastic to prevent cross-contamination.
Final Thoughts on the Recipe
This Smoky BBQ Chicken Cutlet recipe is a testament to the fact that great cooking is about technique rather than complexity. By focusing on the preparation of the meat and the timing of the glaze, you create a dish that is far greater than the sum of its parts.
It’s a meal that feels special enough for a celebration but is simple enough for a Tuesday night. It’s time to ditch the boring, dry baked chicken and embrace the bold, smoky, and irresistible flavors of restaurant-style BBQ at home.
Whether you’re feeding a hungry family or looking to sharpen your culinary skills, these cutlets are a guaranteed win. The crunch of the crust, the sweetness of the sauce, and the tenderness of the chicken will have everyone reaching for seconds. Enjoy your journey into the world of indoor BBQ!